For ten years, I owned a 4WD Kia Sorento. As I detailed before, the 2003-2009 Sorento ended up as a surprisingly capable vehicle for rougher terrain in soccer-dad SUV guise.
It took me many places, and I essentially lived in it for almost a year.
Part of the utility and maximizing the space ended up making a simple cargo shelf/storage area that allowed gear organization and a sleeping platform for myself and my 5’6″ frame.
Though I would not earn any carpentry accolades with this shelf, it served me very well for quite a few years, miles, and nights in out-of-the-way-places.
It worked, and it worked well enough. But it required careful packing to make use of the somewhat limited room.
Once the Kia went kaput, we decided a mid-sized pickup would meet our needs best. I drove a compact GMC Sonoma (S10) for many years and quite enjoyed owning a truck. The cargo room, the simplicity, and I can’t stress enough how much I loved the tailgate. But a 2WD pickup did not work well in Colorado esp when it snowed.
The Kia ended up as a choice that worked well for the time and place in my life, but a compromise.
Not so with the Tacoma. Compact pickups just aren’t available in the US at this point, but a midsized one makes a potential option. Not so large for the tighter dirt roads in hairpin turns found here, a 73″ bed for a nice compromise between space for us and not too big. The stock 4WD SR5 provides enough ground clearance and capability for the rough but not overly technical roads we typically drive. Rule of thumb for me: It if takes as much time, or even slightly longer, to walk a road vs. driving it, we’d rather walk it!
Additionally, we went with the access cab as it is usually just us, and we preferred a longer bed vs. more cab space. Finally, we went with the 2.7-liter engine as we don’t tow or haul huge loads, the engine has legendary reliability, and it’s also considerably less expensive than the 3.5-liter version. It’s a great truck for us and our needs. And I have no doubt we’ll own it for ten years. Or more.
Note: I should add the truck is more-or-less our recreational vehicle. For in-town or pavement driving, we use a Honda Civic hybrid that gets 45 MPG. I often WFH and do not do much in-town driving overall. If your truck serves more as a daily driver, your needs may be different.
Once we purchased the truck, we knew we’d eventually buy a camper shell to protect our gear from both the elements and crimes of opportunity. And, of course, enjoying an occasional sacking out at trailheads.

With winter and the cold weather, we find ourselves sleeping in it more often and have had a few months to dial in the system to something I think works well for us. Come spring, we’ll go back to tent camping as we do enjoy the cooler air. Though sometimes a quick camping trip before a backpacking trip is still utilitarian in the truck vs. setting up a tent.
But here’s what I found worked for turning the Tacoma into our comfortable camping setup that’s not overly complex over the past few months.
~~~~
The first step in turning the Tacoma into a camper is also the potentially most expensive. That means the camper shell (also called a “topper” or a “cap.”)
You can luck out and find a camper shell used, but that’s more of an option in the Denver or SLC metro area. And then I’d have to transport the shell back to Moab and install the shell correctly. Assuming I found the shell I wanted for our needs.
After some discussion and not finding a suitable used one, we decided if we plan to own the truck for a decade or more, it’s better to have some professionals do it and do it right.
Nick Gatel of PopUpBackpacker has an excellent synopsis of the different options.
We went with Rocky Toppers out of Grand Junction, CO, as they are the closest ones and had the best prices. I have no affiliation with the company other than being a customer and enjoying their excellent customer service.
We went with the A.R.E shell as I think they had the best styling and availability due to COVID slowing down the order vs. competition. The MX Model provides a nice happy medium between the head-room availability without so much space that I’m getting into large SUV territory. Additionally, A.R.E had a special where the shell came carpeted included in price. The carpeting helps provide some warmth and cut down on the condensation as well. I sprung for the extra $30 and put in an accessory light to help load and unload the truck in the dark. Altogether, with tax and installation, it came to about $2200. Again, rather expensive. But if we continue to have 90 bag nights in the coming 10+ years, I have no doubt we’ll make use of this purchase.
Once we got the shell installed, it became a matter of tweaking the setup to work for us. After four months of constant use, I think we have the system dialed in. The nucleus of the setup is the perma-camping kit but modified for Tacoma use.

The gear is always packed, organized, and ready to go. Organization and preparation let us enjoy the outdoors when time gets available. In front of this gear, we may have the larger camp tote, a cooler, a water container, and a “pantry tote.” The small cook kit duffle goes in front for easy access. All the other gear such as sleeping bags or our backpacks go on top. Personal clothing’s in the truck cab.
With the camper shell, here’s the rest of our system. There are many, many, many articles online on turning a camper shell into a mini-RV. But I wanted to keep it simple, still have access to the truck bed, and recognize that we use the truck to sleep and not live in it. We also tend to camp in out of the way places and do not need as much stealth. As I learned with the Kia, having underneath storage works well but complicated things, too. More so in a truck where I can’t open side doors to access the back part of the cargo shelf system without drawers.
Even though our car camping kit is luxurious compared to our backpacking standards, it is simpler than many. And our sleeping system reflects it. I should also add Joan and I often share the Big Agnes tent with a width of 42″...the same width as between the Tacoma wheel wells. The accessible wheel wells also provide some convenient shelves for things such as a mug. Others may need more room.
Here’s what I found works for us.
- The first part beyond the camper shell ends up as a full sheet of 1″ thick gym rubber and cut down to fit The gym rubber provides cushioning when kneeling in the truck shell, makes for durable material if I still want to haul things, both clean and removes easily, provides some R-Value, and easy to cut and shape around the truck wells and tie-down points. In a pinch, I can sleep on the foam, less so for Joan. It costs $130 for this sheet delivered.

In the tote you see above “lives” the following we have pads, a tent, an 8×10 tarp, accessories in a storage bag (bank line, carabiners, zip ties, bungee cords, duct tape, and a Bacho (Mora) knife), and a tarp/awning we use for sun or rain.
In more detail:
- As mentioned, there just enough room for two people between the wells. Our preferred sleeping pad ends up being too wide. For winter use when we camp in the shell more, I went with pads similar to the Lightspeed ones we use for car camping, but less wide and thick. I don’t know the pads’ weight, but they are 1.5″ thick, 20″ wide each, and (very important!) two of these fit between the wheel wells. We end up having nearly 3″ of cushion total and excellent R-Value this way. As a bonus, they make excellent loaner gear for temperate weather when people join us for camping. Since we tent camp more during three-season use, I’ll swap in the other pads when the weather warms up. If we should sleep in the truck when we just want a quick camp, we can just use our backpacking pads. Again, we like tent camping when it’s warm or not rainy.
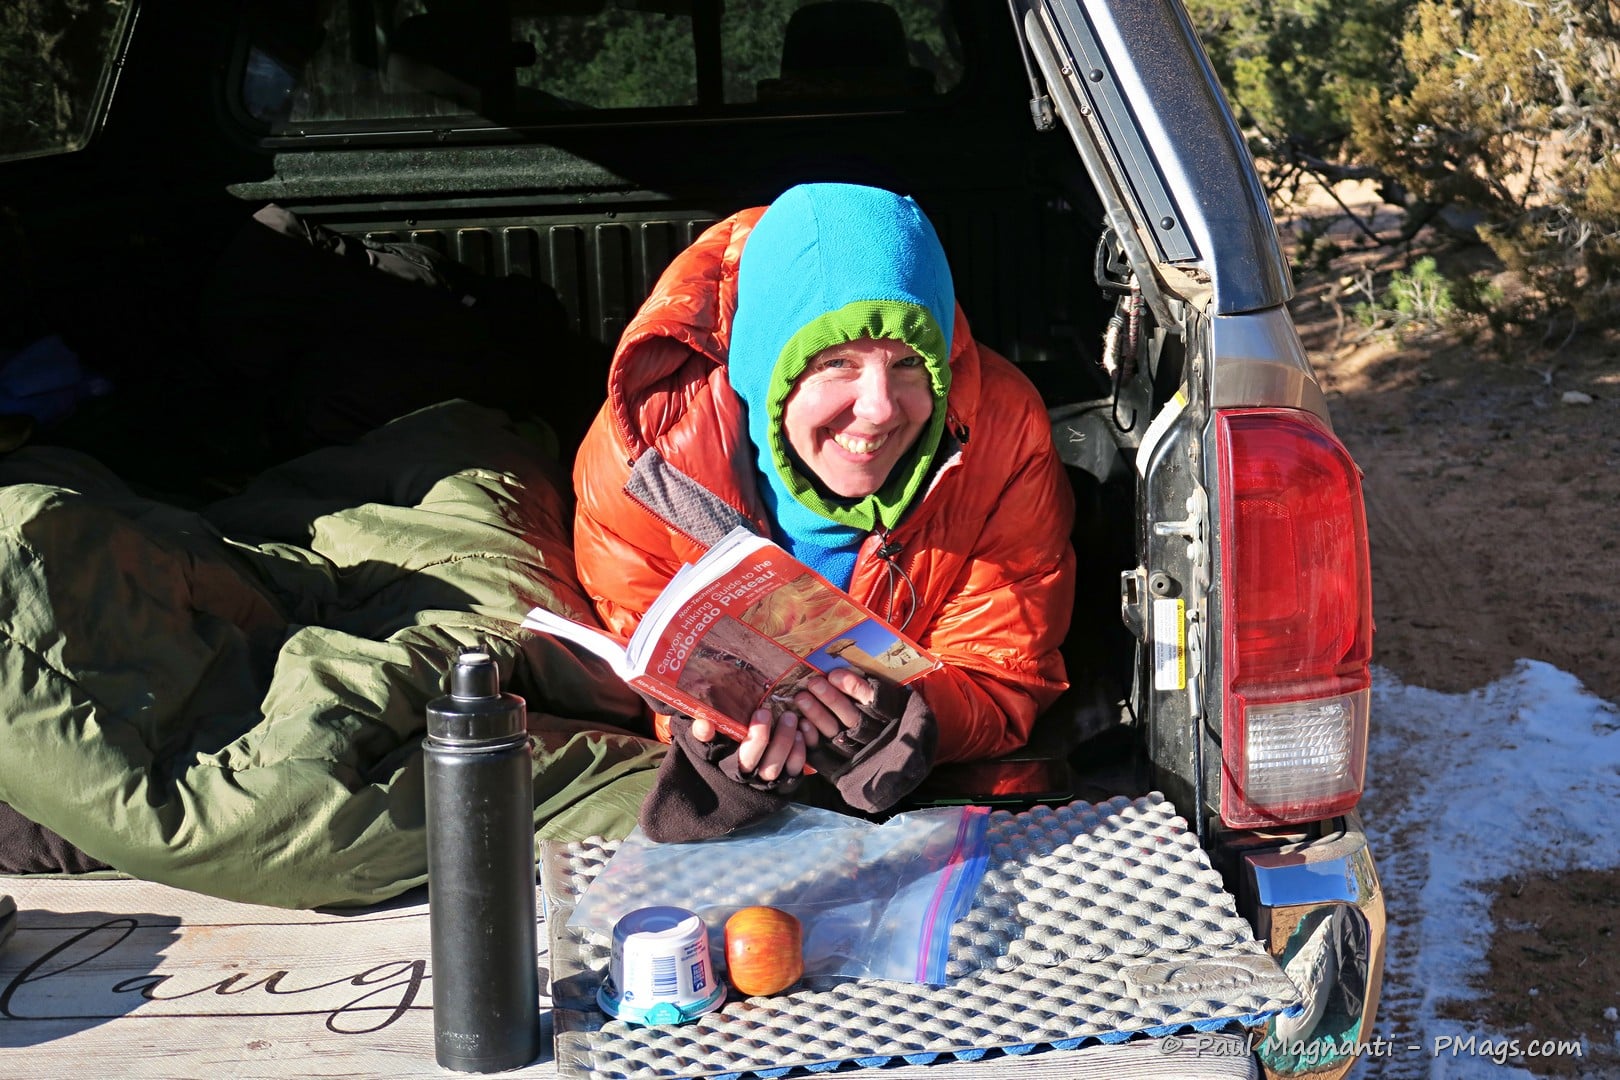
Waking up somewhere in the desert, looking over the guidebook, and figuring out the day’s hikes. Our idea of a leisurely morning.
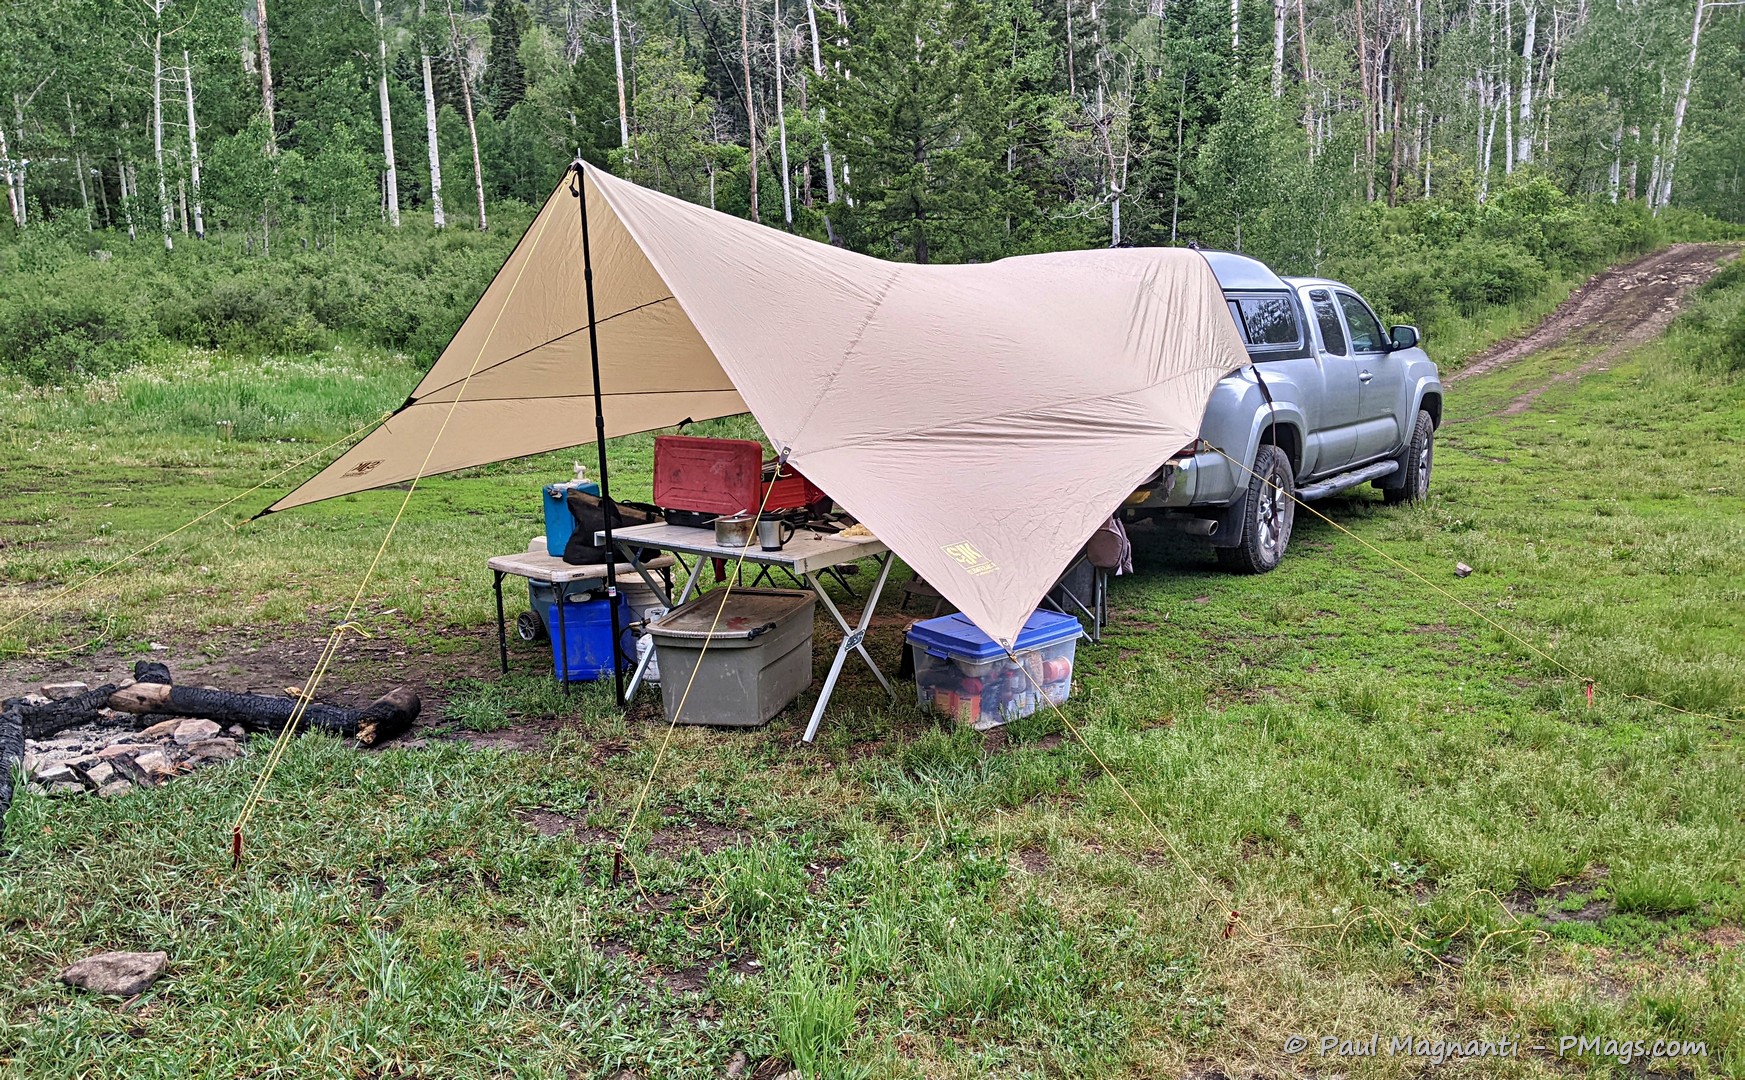
- Speaking of rainy, we purchased the amazing Slumberjack Roadhouse Tarp for $120. It is essentially a tarp made for SUVs and trucks with camper shells; it sets up quickly, extremely versatile, and weather resistant. We used it a few times during the summer rains in the mountains before we received our shell. Otherwise, I’d have some photos. It provides a great place to cook, hang out, and get out of the sun or rain. Joan and I both marveled at how much thought someone put into the design and how compact it is overall when packed up. Highly recommend it. If you factor in the cost of a similar quality tarp, stakes, poles, and guylines, the overall cost is reasonable, in my opinion. Update February 2021 – Read more about it here
 .
.
- Continuing our homey theme, Joan and I met a person in Horseshoe Canyon who had a kitchen mat that fits just over the tailgate (get a large size or cut one down). Joan immediately wanted one for sitting on, leaning on when lounging out in the morning or the evening, and making an area to place things on. Combined with our scraps of foam pads that serve many different purposes (sit pad, changing pad for shoes, insulation on the side of the wheel well when sleeping, etc.), the liftgate makes a suitable place to sit. During more temperate weather, we use the camp chairs stored in the back of the truck. And the tailgate doubles as a table/cooking area. The “Live, Laugh, Love” mat ends up as delightfully cheesy, homey, and good advice for anyone. Joan provided the link if you want the specific version of this tchotchke for your tailgate (the 18″x55″ mat overlaps slightly).

- The carpeting allows us to have two velcro mesh cargo pockets containing a Luci light. We find the Luci Light gives a soft glow at night, perfect for inside the truck cap. The pockets themselves become handy at night for stashing items.

- And we added a carabiner and velcro to handle the light at night.

- Towards the front, we always have a small patio-style folding end table and a heavier duty Lifetime table that I picked up years ago at Costco and is sturdy enough to hold a 7-gallon water jug. In front of the folding end table, there’s also a small step stool bungee corded down. I’m just short enough where a step stool makes getting in and out of the truck bed easier vs. continuously jumping in and out of the truck.

- Behind the white table, you’ll find another ever-useful tarp (great for placing gear on so it does not get dirty or wet) and a small whisk and dustpan that makes Joan particularly happy. 🙂

- Speaking of making Joan happy, the Home Depot bucket gets lined with a trash bag and helps prevent the bag from leaking over the truck. It also helps prevent rodents from getting into the garbage as well. Another tip from our friend we met at Horsehoe Canyon.
- The stuff sack tucked in the upper left corner contains two fleece blankets and two poncho liners. During temperate weather or even into late fall, they get combined with a synthetic quilt (two inexpensive rectangular bags zipped together) we use for camping. The poncho liners/fleece blankers are useful with camp chairs, too. We keep the camp chair tucked behind the opposite wheel well and make for an easy grab even when the truck’s packed.

In October. PCO Joan. Note the step stool placement. 🙂
- There are two duffle bags. The one in front is always packed and contains our quick-cook kit. The other one has a basic auto repair kit (battery jumper, tools, compressor, etc.). I go into more details for those items in the perma-camping kit article. I always pack the cook kit towards the tailgate since it is handy to have it accessible for a quick hot lunch or drink when traveling or even after a hike.

- The NoBox Globe Lantern gets hung from the liftgate this time of the year as we tend to cook in the dark after hiking all day or making camp on a Friday.
- Finally, the Sterlite tote does double duty as furniture. It is a 50-gallon size and makes a bit of a counter for cooking. It locks down for more security in the wind or keeping rodents out, too. The tote also does additional duty as an ottoman of a sort when we use our camp chairs.

Our cozy winter camp. I think this setup is the “dialed-in” configuration after months of using the truck for camping. Quick to set up and break down and efficient in use. Esp for quick trips.
I can’t say enough about our -15F Sportsman Guide “Guide Gear” semi-rectangular bags for cold weather camping. Excellent winter sleeping bags that’s proved their worth for almost 15 years now. And only $75 each.
As mentioned, we’ll pair an inexpensive sleeping bag setup with the poncho liners/fleece blanket combo as the temperatures dictate for a versatile three-season setup.
The sleeping bags and any backpacks we have for the trip are easily set on top of the totes with the mid-high cap’s storage.
If we make an extended trip in one place, such as Hovenweep, this past Christmas, we’ll take the larger camping tote prepacked with utensils, cleaning kit, eating kit, a two-burner stove, and five-pound propane tank and adapter. We use a larger roll-up table in conjunction with this kit. The two-burner stove allows more versatility and ends up more fuel and cost-efficient vs. the one-burner stove.
Hovenweep, Dec 2020. PCO Joan.
Finally, we take the appropriate water jug and cooler. We always have a pre-packed “pantry tote” with canned goods, dried food, olive oil, and drink mixes. I pack everything neatly and well organized, so everything is easily grabbed and laid out in a manner that allows ease of access. If we want to brew up a post-hike hot drink, for example, the small cook kit, hot chocolate mix, and water are all within easy reach and stage easily on the tailgate. Perfect for a post-hike hot drink before the drive home. We always re-pack the pantry tote after each trip and just grab it when we are ready to go on another weekend of fun.

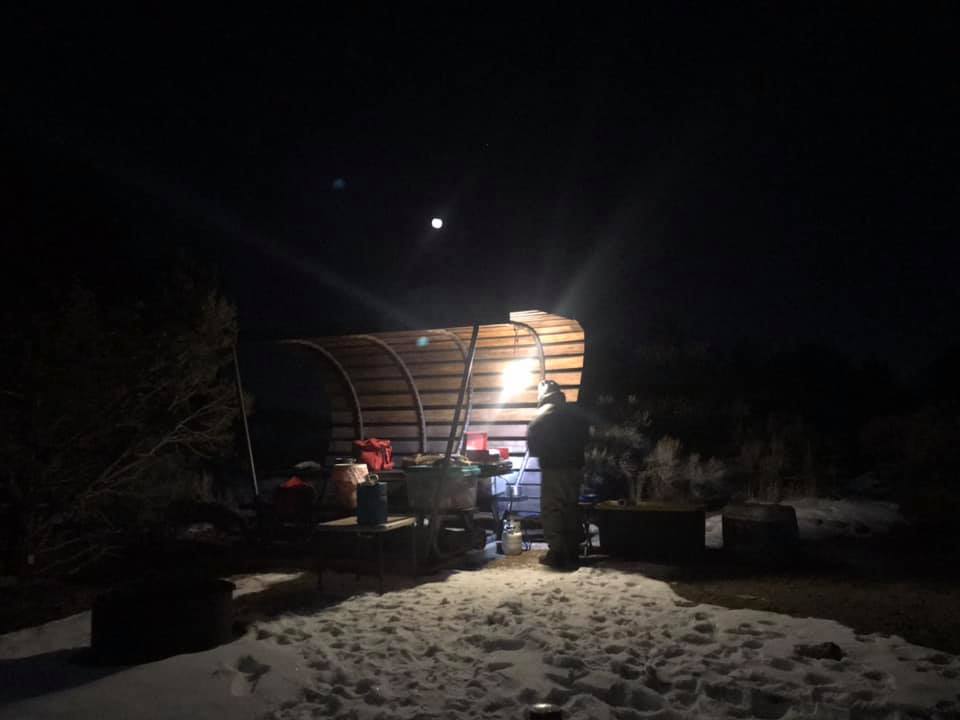
At the end of a jeep road with an amazing sunrise and sunset view also next to an 800+ yr old travel path. And we had it all to ourselves. PCO Joan
And that’s our Tacoma camping setup. We’ve spent many nights camped out with, or in, the truck. And think we will spend many more of these camping nights to come.
We love our Frontier and went with a Softtopper out of Boulder for our topper. Not hard, but holds up to snow, etc.
The lights are a nice touch!
Your setup looks amazing. I’m jealous of how quickly you must be able to get out of the house and just go!
How do you deal with bears when you’re away from the truck? Do you have to pull all the pantry stuff out to bear bag it?
While we have bears here (mainly in the La Sal mountains, Abajos. and the somewhat close-by San Juans), they are not as nearly aggressive as their Sierra cousins. Putting the food in the camper shell is fine esp in dispersed areas. Rodents tend to be the larger issue overall esp in the high desert.
If we had to camp in Yosemite or even RMNP, they mandate putting anything with food odors in bear boxes overnight.
The Slumberjack Roadhouse Tarp is just what I’ve been looking for! I had no idea they existed until I saw your article. I’ve spent many nights in my S10 with a topper. Thanks for the article.
Grumpy
(Formating funky. Edited for clarity only -PM)
Such a simple item but so well designed and made. Many other awning setups get sold, some similar pricing even. If not more. But less versatile and more futzy to set up. With two of us we get it set up in ~20 minutes. So many different configurations to use as well. I need to set it up with the shell and get some better photos.
Well done! If you have any tips for those of us that need to seat 2 adults and a kiddo in a car seat in our adventure mobile please opine!
THanks! It all depends on where and what you are doing for your setup. Honestly, if you are not going up any gnarly roads, a minivan works well. Relatively decent on gas, good storage, easy parts to acquire, not a land yacht so easy to park, and you can pull out the seats for more space. Jucy sells used minivan conversions. My friends bought one for them and their two boys (4 people) and then drove it back from Las Vegas to Denver (pre-COVID) and it worked really well for them. https://www.jucyusa.com/rvs-for-sale/ They have different configurations to choose from. (And… Read more »
Hi, did almost the same with my 2015 Tacoma access cab, (cheaper aluminum shell). Made a cargo shelf of 2 1×12′ pine shelf boards placed across the bed up next to the cab. When I arrive at the camping spot I just transfer gear from the floor up onto the shelf to free up floor space for sleeping, plenty of foot room underneath. Also made a plywood cover for the inside of the tailgate held in place with web straps, this allows a flat place for campstove setup / cooking on the tailgate. Also designed a cargo shelf with pullout… Read more »
Sounds good. There are two of us and we also carry skis and packrafts so did not want to lose bed space too much. All different choices that work for sure.
ps. Do you have any photos? I’m always looking for more ideas to steal..er get inspired, from. 🙂
Hi, thanks! I will take some pictures and fwd. them to you at first chance.
Cool! You can attach it to the comment, too.
Thanks, Mags! Your feature has given me a lot to think about. (And I still think of you as Magaroni, BTW, circa 1998.) The lease on my Ford Escape ends in March and I’ve been looking around. I’m kind of sold on Ford because it’s never let me down and it’s the only dealership in my town. I’ve been considering a truck, along with another Escape. I’ve owned two Sonomas and one F-150 in the ’90s and early ’00s. As I’ve aged (turning 70 in June–how did THAT happen?), I still backpack and dayhike but everything has slowed down along… Read more »
Please do! I’d love to answer any questions I can.
ps. I turn 47 this year. I am now closer to 50 than 40. Makes me pause!