Basic Backpacking Primer
“Climb the mountains and get their good tidings. Nature’s peace will flow into you as sunshine flows into trees. The winds will blow their freshness into you, and the storms their energy, while cares will drop off like falling leaves.” –John Muir
Backpacking is a favorite way for many people to enjoy nature. Moving a slower pace, the mountains are savored. The rhythm of hiking seems to make all the stresses of day-to-day life seem that much more insignificant. And there are few experiences sweeter in life than being on a ridge, drinking some tea and watching the sunset over the distant mountains.
Backpacking is a past time that many people, especially once moving to Colorado, are curious to try. But the thought of going overnight into the mountains, especially solo, is not too appealing for some. If you are new to backpacking, this primer will help you become familiar with what exactly an overnight trip entails and how enjoyable it can be.
Clothing to bring on a backpacking trip
If you day hike, you probably already have the basic clothing you need for backpacking and are aware of what to bring. To those new to the outdoors (or just want a bit of a refresher) read on:
The quick and dirty rule of clothing to bring on a backpacking trip is NO COTTON. While cotton is comfy, it can make for an unpleasant trip. Cotton, when wet, loses all insulating value and will actually take the heat away from your body, possibly causing hypothermia. Additionally, sweaty or wet cotton clothes can cause severe chafing (your “tighty whities”, blisters (your cotton gym socks) and all around “icky-ness”. Try putting on a cotton t-shirt sweaty and damp from the previous day. Talk about a wake-up call. 🙂 Leave the blue jeans and cotton T-shirt in the car to change into after backpacking. The exception to the no cotton rule is a bandanna. A bandanna has many uses and will actually help cool you down due to cotton’s properties of taking heat away from your body. On a hot day, a wet bandanna is heaven.
For most hiking during the day, synthetic shorts or long pants with a synthetic top (short or long) works well. You do not have to spend a lot of money to get these two basic pieces of clothing. You probably already have a pair of nylon running shorts in your closet that works well for backpacking. Swim trunks also work well. Synthetic t-shirts are fairly inexpensive. You can also raid the thrift store for polyester shirts that may be funky looking (I have a lovely button down khaki shirt I use 😉 ) but are inexpensive and work well. On your feet, wear wool or synthetic socks. Again, cotton socks will soak up sweat and probably cause blisters. No fun!
During inclement weather, dress in layers. The basics of the layer principle:
1) Wicking inner base layer
2) Middle layer to retain body heat
3) Outer shell layer to keep out the rain and the wind

US military showing the layering principle. Your layers will feature less camo and no combat boots. Maybe? 😉
The wicking inner layer is sometimes wool but is usually synthetic. Think of this layer as your “long undies”. Typically the synthetic underwear is known by such names as Polypropylene, CoolMax, DuoFold, etc. Wear this layer when it is cool out and you need to keep warm. This layer will move the sweat away from your body, helping you to regulate your body temperature. This layer is a very important one for keeping you warm and dry.
The middle layer during three-season backpacking is typically only a jacket or a sweater. A fleece jacket or a wool sweater works great. Some of the down or synthetic “sweaters” work well, too. Again, you probably have one of these two items in your closet. Please do not bring a cotton sweatshirt. A wet cotton sweatshirt will take forever to dry and has no insulating value. Though chattering up in the mountains may be romantic in a “braving the elements kinda way”, it is much easier to enjoy hot cocoa when you are not shivering. If you get cold easily, fleece or wool pants may not be a bad idea. One VERY important piece of clothing to bring is a wool or fleece hat. A person loses much heat through their head, and a hat can help regulate your temperature very easily. Feeling cold? Throw on a hat. Feeling warm? Take off the hat. Feeling cold while sleeping? Throw on your hat! Mom was right: “if your feet are cold, then put your hat on!”
The last layer is the shell layer. This layer is meant to keep out the wind and the rain. You can use anything from an expensive Gore-Tex jacket to a simple coated nylon pullover. The key is to wear something that keeps out the wind and the rain. If you are new to backpacking, no need to buy the most expensive jacket. Something simple will work well enough for this trip. You can probably use something that is already in your closet. I would not suggest a poncho for most Colorado backpacking. While some use a poncho quite well, a poncho becomes a big sail for most people when in the windy, above treeline conditions found in Colorado. Ultimately, the key is to enjoy yourself, not break the wallet.
Clothing can be placed in a stuff sack. You may want to line the stuff sack with a garbage bag.
Footwear
The shoes you use to day hike in should be fine for this trip. Be sure they are comfortable, fit right and can be used in mountain terrain. You do not need to use the 5 lb “waffle stompers”, but something that will support you and your pack on the trail. The large, heavy leather boots are overkill for most people. If you are new to backpacking, you will probably be carrying a moderate weight load.
Trail shoes or even running shoes work well if you keep the pack weight down and/or on a well defined and maintained trail.

Stylish? Yes. Practical? No.
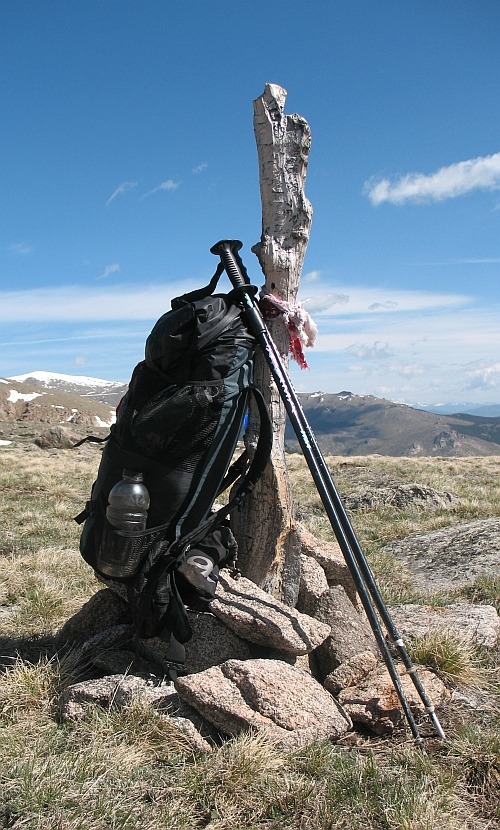
The backpack
A backpack is what carries your sleeping bag, clothing, Snuffleupagus stuffed animal, and food (esp. Snickers….mmmm…Snickers). There are many different types of backpacks out there. Internal frames. External Frames. Frameless Rucksacks that use sleeping pads for frames. Confusing!
What it all boils down to is that you need a pack that will
A) Carry your gear
B) Will carry it comfortably
C) Fit you right
In brief the differences between the three types of packs are:
1) External Frame: What you always see people use in movies! The frame of the pack is on the outside, the sleeping bag is typically below the pack. You get the rugged Jeremiah Johnson looking going with this pack! Rarely used by most backpackers at this point.
2) Internal Frame: The frame of this pack is INSIDE the pack. Looks a bit like a duffle bag. When you see an outdoors commercial on TV, they always seem to have this type of pack. Curiously, it is always inside the SUV they are typically driving….
3) Frameless Ruck Sack: Similar to the above except no frame. Typically, a person will stuff clothing or use a sleeping pad to make a frame. You will see this type of pack used by weird lightweight backpacking fanatics that, by coincidence I assure you, look very similar to me. Except this type, again by coincidence, tends to look like a dirtier, sweatier, more heavily bearded, skinnier version of me. Hmmm….
If this is your first backpacking trip, I strongly suggest you borrow (or rent from Neptune, REI, EMS, etc.) a pack before buying one. The pack should be the LAST piece of equipment you purchase. Only when you know what gear you will bring for future backpacking trips will you know what kind of pack you really need. Borrowing and renting gear allows you to try many different types of packs until you find a pack that works for you. You do not need the largest pack available, just one that will fit your gear and be comfortable on you.
Sleeping bag and sleeping pads
A sleeping bag is what keeps you warm at night. Most people find a 20F bag to be about right for three-season use. The two types of bags out there are synthetic (PolarGuard 3D, Hollofill, etc.) and down. Synthetics are heavier, bulkier but are less expensive than down bags. They will also stay warmer when wet. Down bags are more expensive but are less bulky, weigh less, are more durable and tend to be a bit warmer. The down side (groan!) of a down bag that when a down bag is wet, it is useless. This is more of a minus in say the Pacific Northwest than the dry climate of Colorado. I will admit my bias for down. Being a lightweight backpacker, I find the lightness and durability of down to be what works for me. In the many miles of using my down bag, have never had a problem.
Whichever bag is used, you should place the bag in a stuff sack lined with a garbage bag.
More info about sleeping bags…
The sleeping pad is what keeps the cold ground away from you at night. The two basic types of sleeping pads out there are the Therm-a-rest types (think of an air mattress) and the foam pads (Z-Rest, Ridge Rest, the ever-present blue foam pad you see in XYZMart’s camping section). Therm-a-rests are considered by many to be very comfortable. But, they are expensive and weigh more than a foam pad. There are newer pads that are very light, but are more expensive and less durable as well. Again, you may want to borrow or rent a pad and see what works for you. Always bring a sleeping pad, as it will protect you from the cold-robbing ground.

The Devil Duck guards this tent from boogey men, thieves and just plain-ole-bad people.
Shelter
A shelter is what protects you from the elements while you are sleeping. For some, it can be a simple tarp to set up only when raining. For others, if it s free-standing 4-season “Taj Mahal”. If this is your first backpacking trip, I suggest you use a tent. Tents are easier to use and setup for the beginners. A tent can also be shared easily among 2-3 people. Be sure to bring a three-season tent if you can. A four-season tent would be overkill for this trip. As with other backpacking equipment, you may want to share, borrow or rent a tent before plunking down your hard earned money. It is better to see what works for you than buy something you are stuck with.
Some people will also bring a ground cloth for a tent. If you beat on your gear and/or are camping in rough terrain, may not be a bad idea. More information here.
Old school tarping in the sleet in the Colorado high country. More great tarp info here.
Stoves and cookset
Simply put, you bring a stove to cook your food. Backpacking stoves are marvelous little devices that do not (comparatively speaking) weigh much, put out a lot of heat and lets you eat your Ramen in the middle of the mountains. The types of stoves out there are confusing. White gas, Esbit, alcohol stove, canister stoves! If this is your first trip, don’t worry about what stove to bring. I strongly suggest you share a stove with one or two other people. There will be enough varieties of stoves on this trip that you should be able to see all the different types. I have SEVERAL different stoves myself. 🙂 I assure you, no one will go hungry due to a lack of a stove on a trip I organize. Honest!
The Cliff Notes version of stoves are:
1) White Gas Stoves used to be the type of stove popular with most backpackers. Uses white gas (aka Coleman fuel). Boils water rapidly, easy to obtain fuel, most fuel efficient for large group use. Relatively heavy, can be complex to use. Common types: Whisperlite, Svea 123, Coleman Peak and many, many many others
2) Canister Stoves Uses a fuel canister with a (typically) screw on burner. The canister stoves are very easy to use. Great for short trips, hard to re-supply canisters. Plus you have to pack out “empties”. Common types: Pocket Rocket, Sno Peak Gig, Jet Boil
3) Alcohol Stoves Very light in weight, easy to use, no parts to break down. Only fuel efficient if you do “boil and cook” type meals (i.e. Mac n’ Cheese). Not suited for group use.
Common Types: Soda can stove”, Trangia
There are more stove types (Zip, Esbit), but the above is a basic synopsis of the main types. Oh yes..what about cooking over a fire? Unfortunately, while cooking on an open fire works great in a Clint Eastwood movie, it does not work well for most backpacking. In the recent drought years, there have been fire restrictions. Plus, a campfire can take too long to make for the purpose of cooking. Finally, a large cooking campfire is not very environmentally sound. It uses wood that may be scarce in such areas as above tree line. However, a small campfire in a safe area with lots of downed wood can be great for the end of the day while talking to your fellow hikers.

The cook set can be very simple. A pot to boil water in (and eat out of if going minimalist), a bowl and a large spoon. You can share a main cooking pot to boil water for meal. A general rule of thumb for a pot to share is one liter per person. A one-liter pot is good for one person. A two-liter pot can boil enough water for two people, etc.
As a final note, three people can seem to comfortably share a white gas and some canister stoves. An alcohol stove can be shared if both people are cooking simple meals, but the stove is really meant for a solo hiker.
If you want a thorough analysis of backpacking stoves, check out this little doc I wrote.
Hydration and water treatment
Keeping hydrated is very important. If you are dehydrated you will feel sluggish, get cold at night, and not enjoy yourself. Drink plenty of water and drink often. You can carry water in something as simple as a Gatorade bottle or you can use a Camelback type of hydration system that is popular with runners, bikers and increasingly more hikers. Whatever you choose to bring your water in, be sure to bring enough water to drink. For most people, a liter every five miles works well. Carrying two liters at a time is standard.
You may also want to bring a container with a large capacity (i.e. a Nalgene Canteen, a Platypus, a dromedary bag, etc.) to carry water back to camp. Since we are normally camping near water`, this is not quite as important an issue.
On a topic related to hydration, is the topic of water treatment. Most of the time, it is almost impossible to carry enough water for an entire trip. Luckily, except in desert hiking, water is obtainable fairly frequently. But, you may have to treat your water. There can be nasties in the backcountry that can ruin a trip in the long term if bad water is drunk. Some people will drink out of every cow-pattie infested, smelly water puddle without even using a drop of iodine. Others will filter, treat chemically and boil water three times before drinking from the clearest Sierra spring 12000 feet above anything. Most people are somewhere in between. This document will not go into the various arguments about water (or lack of) treatment, but sufficient to say most people do use some form of water treatment.

Four common ways to treat water are:
1) Boiling Boiling water to a rolling boil will kill nasties in the water. But, it takes very long, makes the water tastes flat, and uses lots of fuel. Most use boiling as a last resort only
2) Chemically Using iodine is the old standby for water treatment up until recently. Typically known as “Portable Aqua” these tabs will treat one liter of water each. They take longer to treat water than a filter/purifier but are lighter and less complex than the filters. Iodine does have an aftertaste that some people do not like. You can also use iodine crystals (i.e. Polar Pure) and a newer chemical treatment known as Aqua Mira. Aqua Mira takes less time to treat water than iodine and is a two stage chemical process.
3) Filters/Purifiers Filters and purifiers are for most people the standard tool in the backpacker’s water treatment arsenal. Though they are heavier, bulkier and can break down/clog, they will treat water quickly and without a chemical after taste. Works well for use with water that has “floaties”. If using a filter, be sure to keep the intake (dirty water) and output (clean water) hoses separate.
4) Steripen The equipment of choice for geeks! This pen-like device uses UV radiation to sterilize water. Besides being a bit expensive (~$80 online), it also depends upon batteries. They are also somewhat fragile and need more care than other methods of water treatment. Works best in clear water without murk or “floaties”. Its main attraction is that it is quicker than other methods of treating water.
Filters, Steripens and, to a lesser extent, chemical treatment can be shared among multiple people on this trip.
Finally, be sure to wash your hands after “doing #2” and before eating. A simple bottle of Purrell (alcohol based hand sanitizer) can do wonders to prevent GI illnesses (tummy ache and the runs to non-medical types like me!). No point in treating water if you are sticking a dirty hand in your food..or worse yet, you may stick YOUR dirty hand in someone else’s GORP. Yeeech!
There is increasing consensus that sanitation is more important than water treatment for preventing GI illnesses in the backcountry.
From http://www.rei.com/expertadvice/articles/hygiene+sanitation.html
“A bigger concern, Backer says, is what medical types such as him call “fecal-oral transmission.” Ew, gross. But it happens. Happens a lot, in fact—and research indicates it causes many more cases of intestinal distress than does ingesting Giardia.”
Waterborne pathogens such as Giardia are not as widespread in backcountry water sources as once believed. A number of researchers and medical experts believe that much water in the wilderness (particularly in remote, high alpine settings) is drinkable without treatment.
Additionally:
Careful attention to personal hygiene can help prevent the spread of infection. Thomas R. Welch in a 2004 editorial in the journal Wilderness Medicine expressed the view that “stopping hand-to-mounth spread is the key to preventing gastrointestinal infection” and that routine universal treatment of water should be de-emphasized.
Treat water when in doubt, but more importantly listen to Mom and wash those hands!
Food
In my Boy Scout days, camp food was typically Spam, canned beef stew, canned beans, etc. When I started backpacking, I thought that is what I was supposed to bring. I found out in a hurry that there are easier to cook and lighter foods to bring on a backpacking trip. Backpacking food should be high in calories, light and easy to cook. On a short trip such as we are doing, packing a lightweight food that is high in calories is not as critical, but it is still good to keep these facts in mind. A can of tuna won’t hurt. Packing five cans of Hormel “Big and Meaty” chili might.
One alternative is the “Mountain House” type meals you see for sale in such stores as EMS. These freeze-dried meals taste halfway decent, are light and easy to cook. (Just add boiling water!). Be warned, they expensive for the amount of food you get. But the convenience and ease of use makes them a good choice for many people.
And on an overnight trip, the cost factor is not as important.
The local grocery store has many items that work great for backpacking meals. Instant oat meal, mac n’ cheese, candy bars, nuts, raisins, etc. Without spending as much money, you can pack some food that packs a caloric punch without breaking the wallet and offers more variety than the freeze-dried meals.
Another alternative is to make your own dehydrated meals. With a food dehydrator you can make your own fruit leathers (aka fruit roll-ups), dehydrated soups, chili, sauces, etc. One memorable meal for me was eating my homemade chili while watching the sunset over Franconia Ridge in New Hampshire. Life (and the chili) was good.
MREs (Meals Ready to Eat – military rations) are often touted as a meal choice. But there is a lot of packaging, they can be a bit heavy and can be somewhat expensive if you don’t buy in bulk. Still, if you break down the packaging and throw the food in a ziplock, MREs can be e a convenient and quick meal for an overnighter.
Whatever strategy you decide to go with for food, the rule of thumb is to pack 2 lbs of food/ day. You will burn the calories while hiking, so plan accordingly. Backpacking is the time to indulge in your favorite food. Burn the calories. Eat guilt free!
On a quick note, you will also want to eat all day. Rather than stop for a long lunch, it is better to “graze” all day. Munch on your trail mix. Eat some cheese. Nosh on that bagel with peanut butter. This fact is more important on long hiking days, but it is still a good rule to keep in mind. Your body is a furnace. And it needs fuel to run. While backpacking, you will be burning a lot of fuel. Stoke that furnace! As my Grandma Magnanti would say: “Mangia! Mangia!”
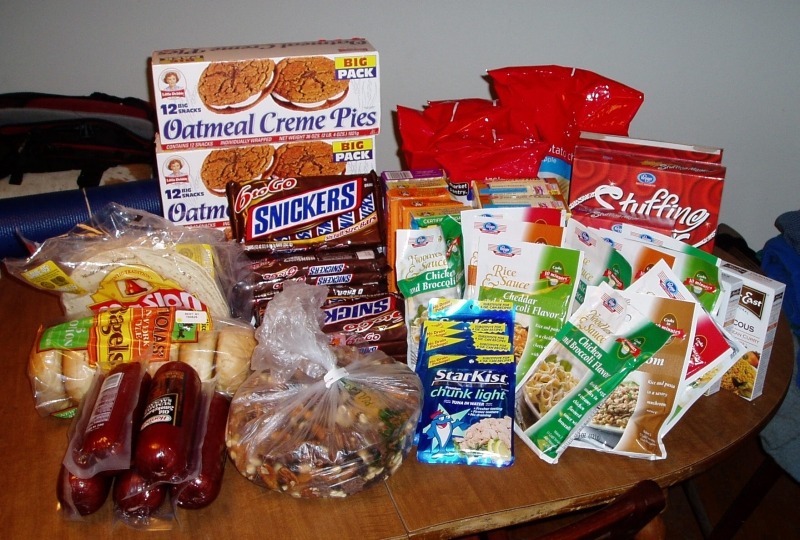
Grandma cooked better food than what is pictured above, though! 😀
Still not quite sure what to bring? Here is a sample menu for an overnight trip using food bought at a grocery store:
BREAKFAST: At home, before hitting the trail
SNACKS: Bagel with peanut-butter, trail mix (raisins, nuts, M&Ms), granola bars ,cheese
DINNER: Mac N’ Cheese with Tuna. Powdered milk.
BREAKFAST: Two packs instant oatmeal, some more trail mix
SNACKS: Beef jerky, dried fruit, cheese, bagel with peanut butter, trail mix
DINNER: We did it! Your first overnight backpacking trip! Pizza and beer at a local bar to celebrate! 🙂
Etc., Misc., And the Rest of the Story
· Flashlight – bring some form of a flashlight. Do not bring a 6volt “lantern” battery, but a simple mini-Mag lite will work. If you have a headlamp, that is ideal. You will need a light to see once it gets dark or if you have to heed the call of nature at night.
· Ibuprofen – You may want to bring this OCD. A pill or two can ease some of the swelling or pain you may get hiking in the mountains and let you sleep peacefully.
· Other First Aid –Keep it simple. Don’t forget many items backpackers carry can do double duty as first aid items. Bandannas make an emergency sling or bandage, duct tape for medical tape, etc. Carry some band-aids, Vitamin I(buprofen) , maybe some alcohol wipes, etc.
· Pocket Knife – a pocket knife is very useful. Everything from cutting your cheese to trimming some rope, it is an essential. Bring one along. You’ll be glad you did.
· SUNSCREEN!!!!!!! – The UV radiation in Colorado, esp. at higher elevations, can be fierce. Bring a small amount of sunscreen. A medication bottle’s worth is usually a good amount to bring. A sun hat is also suggested for similar reasons. Long shirt and pants can substitute for sunscreen on your arms and legs.
· SUNGLASSES!!!!!! – For similar reasons to the above, be sure to wear sunglasses. Do not need anything fancy. As long as they have 100% UVA and UVB protection. Even the $15 drug store glasses seem to offer this type of protection now.
· Remember, this document is not inclusive. This doc contains guidelines and not everything there is to know about backpacking. Ask questions and speak up if you want to know something. Find out what works for you. And most of all: BE SAFE AND HAVE FUN!
Suggested Gear List
A little confused on what to bring? Here is a suggested gear list. Ultimately you are responsible for what you consider to be your comfort and safety level. If you have questions, please ask.
Clothing – Worn
_Boots or hiking shoes
_Synthetic T-shirt or long sleeve shirt
_Synthetic Shorts or long pants (NO BLUE JEANS!!!)
_ Wool or synthetic socks
_Sunglasses
_OPTIONAL: Sun hat, bandanna
WEAR SUNSCREEN!!!
Clothing – Packed
_ Rain Jacket
_ Rain or Wind Pants
_ Synthetic long underwear top and bottom
_ Wool Sweater, Fleece Jacket, or “puffy jacket”
_ Wool or fleece hat
_ Wool or fleece gloves/mittens
_ Extra pair of socks
The Basics
_Pack
_Sleeping Bag
_Sleeping Pad
The Basics that can be shared
_Shelter (suggest a tent for first time backpackers, can be split among 2-3 people
_Stove
_Cook Pot (2 liters for two people, 3 liters for three people)
_Water Treatment. Chemicals can be shared, easier to share a filter/purifier
The Rest of the Gear
_Bowl (if not eating out of cook pot)
_Spoon
_Mug (optional, for hot drinks)
_Small tube of sunscreen
_Hand sanitizer (aka Purrell)
_ Toilet Paper and trowel
_ Pocket Knife
_Lighter or matches
_ Compass
_ Headlamp/Flashlight
_ 2 liter Camel Back, Platypus, etc. OR (2) 1 Liter bottles (Gatorade, Nalgene, Coke, etc.)
_ Map (I’ll be passing out a copy of where we’ll be hiking)
_ Small first aid kit
Food
Two days of snacks,
One Breakfast
One Dinner
A SMILE AND A GOOD ATTITUDE!
Other Resources

Want to learn more about backpacking? Here are some suggested resources:
Quality Gear on the Cheap: If you read those glossy outdoor magazines, you’d think you need a $300 pack, a $300 shell and a $300 fleece. You do not need expensive gear to enjoy backpacking. Often the brand name gear, besides being expensive, is heavy, bulky and overkill for what is supposed to be for the simple joy of walking.
Some articles that I also wrote that should assist in finding inexpensive gear that works well:
Some additional information I will add is that you should invest in a decent sleeping bag. Costco sells a 550 down fill Klymit bag for $140 that weights 2.6 lbs. Not bad..
Need long underwear, hats, gloves, socks, etc? Check out Warm Stuff Distributing (aka The Underwear Guys) . Run, in part, by the well-know thru-hiker Fiddlehead, it features the basics for very reasonable prices. It is mainly surplus, seconds and irregulars. I find this type of clothing is not functionally different from the Patagucci clothing, is sometimes lighter and it is always less expensive!
If you are looking for a light, compressible and warm jacket check out an M-65 jacket liner.
(mentioned in the above article, but deserves to be emphasized).
If you don’t mind a bit of sewing, you can make a Montbell Thermawrap clone for less than $20 with the above liner jacket. A men’s large comes in at 12oz! Conidering a Montbell Thermawrap is $150 and weights 10oz, the cheap way is nice for those on a budget on who need something warm, light and cheap!
Check it out: http://www.whiteblaze.net/forum/showthread.php?t=41034
For high altitude/desert hiking I suggest a long sleeve synthetic shirt for the princely sum of $4 from many thrift stores. (Old uniform shirts, acrylic shirts from Blair, rayon blends, heck,,.even the 65/35 blends are fine!) I’ve used this type of shirt for literally several thousand miles of backpacking.
Trailside Guide: Hiking and Backpacking by Karen Berger
A concise, informative and easy to read guide to the backpacking basics. What I read when I started to learn all about backpacking.
Trail Life by Ray Jardine
OK, lightweight hiking is not for everyone. But after backpacking for a while, you may want to lighten your load. At the very least, this book will let you re-examine what you really need to enjoy and be safe in the wilderness. Read this book after you have hauled a pack up a mountain a few too many times!
Lighten Up! A Complete Handbook for Lightweight and Ultralite backpacking by Don Ladigin
A more humorous, concise and “meat and potatoes” approach to lightweight backpacking. Jardine’s book is more philosophical; this book gets right to the nuts and bolts. Highly suggested!
Andrew Skurka’s The Ultimate Hiker’s Gear Guide is a nice companion piece to the above with expanded info IMO
My own take on going light: A quick overview of how to go light if you are curious.
Still have some questions that you’d like to ask? By all means, please give me a shout!
Original Document: Spring 2003
Revised: Fall 2008 Spring 2012 Summer 2015
Thank you for all the great information – having been a base camper all my life, I am now in my 50’s and looking for solitude! The article was a great wealth of information. Look out mountains, Here I come!
Awesome! Enjoy!
Mags, you continue to be source of distilled backpacking wisdom. I often link to your articles. You probably won’t be surprised however, that I respectfully disagree with this statement: “There is increasing consensus that sanitation is more important than water treatment for preventing GI illnesses in the backcountry.” Here’s how the CDC responded to Dr. Welch “Although the advice to universally filter and disinfect backcountry drinking water to prevent disease has been debated, the health consequences of ignoring that standard water treatment advice have been documented…” To the best of my knowledge, only one peer-reviewed paper has compared water treatment… Read more »
Thanks for the kind words. We’ll just have to agree that hygiene and sanitation are very important and should never be neglected. 🙂
Isn’t this the part where we should start calling each other liars? 🙂
Ha! 🙂 Too true at times..isn’t it!
[…] Magnanti’s Backpacking: A Beginners Primer and his blog Outdoor […]
Lived in Leadville Colorado for about 5 years with the ‘hopes’ of going backpacking every summer, but never do. I am SO close to so much of the CT and for some reason, get nervous and never actually make it out to camp solo (with the dog of course)! I guess I have an “irrational?” fear of hiking. Any advice on busting the myths I have built up in my head? Thanks!
Joan wrote and excellent article about this topic! Of course, I’m biased. 🙂 https://pmags.com/thoughts-on-hiking-solo